Image Profiling Setup
The Image Profiling feature within TruCap+ offers users a powerful tool to optimize image quality for enhanced data extraction results. This documentation provides a comprehensive overview of the Image Profiling setup, explaining its purpose, functionality, and benefits within the TruCap+ environment.
The Image Profiling setup allows users to define and fine-tune a set of attributes that collectively impact the quality of an image. These attributes, including contrast, brightness, and more, can be configured to achieve the optimal image quality that yields the best possible data extraction outcomes.
Key Features and Benefits
Optimized Image Quality: By utilizing the Image Profiling feature, users can ensure that images are enhanced to provide the most favorable conditions for accurate data extraction.
Attribute Customization: The feature allows users to customize various attributes, such as contrast and brightness, to achieve the desired image quality for different types of documents.
Enhanced Data Extraction: Optimized image quality directly contributes to enhanced data extraction accuracy, leading to improved overall processing results.
To open the Image profiling setup page, go to the main menu, and under the TruCap+ Studio, select Image profiling setup.
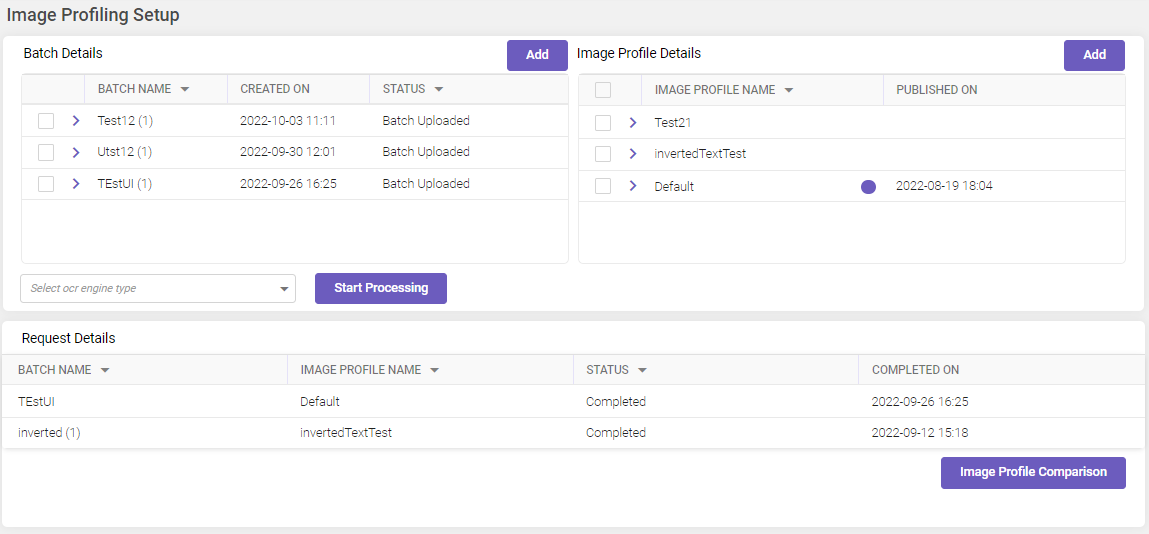
Image profiling and publishing involves following steps:
-
Adding a sample batch. (See Adding a batch.)
-
Creating image profiles that can probably give you the best results for the batch documents. (See Creating an image profile.)
-
Applying the image profiles to the sample batch. (See Processing a batch.)
-
Comparing the results to select the profile that gives you the best result. (See Image profiling comparison.)
-
Publish the best image profile to make it available for use to process the client documents. (See Image profiling comparison.)
Adding a batch
You need to have a sample batch to which an image profile can be added. You can either add (create) a batch or select an existing batch from the Batch Details group. To add a batch, follow the steps below
-
In the Batch Details group, click Add. The Add Batch window opens.
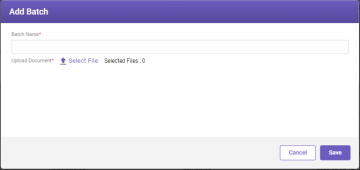
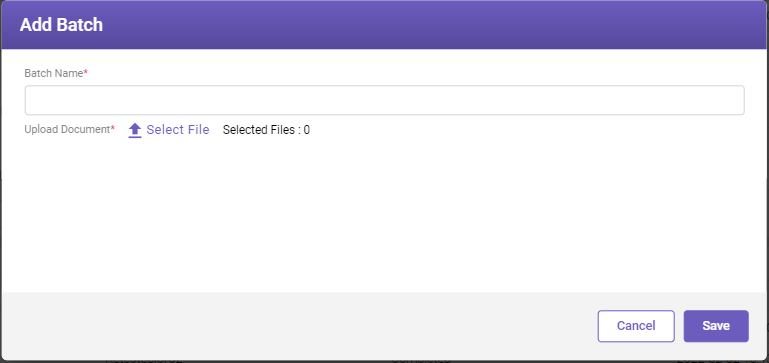
The field descriptions are given in the below table.
|
FIELD |
DESCRIPTION |
|---|---|
|
Batch Name* |
The name of the batch that is to be created. |
|
Upload Document* |
Click on the Select File link to upload the batch files. |
|
Cancel |
To exit without saving any unsaved changes. |
|
Save |
To exit after saving the changes. |
|
* Mandatory fields |
|
-
Enter the required batch name and select the batch files to upload them. Click Save
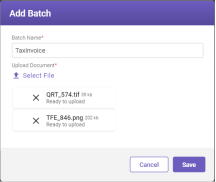
A batch will be created and appear in the Batch Details group.
Note
Batches can be deleted by selecting them in the Batch Details group, and then clicking on Delete.
Adding an image profile
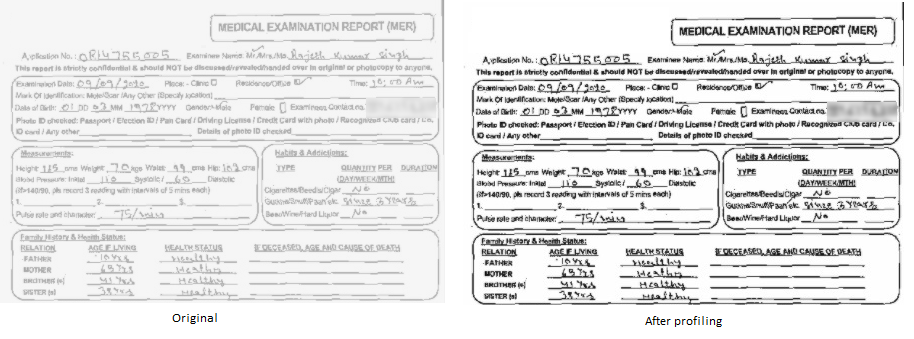
An image profile is a collection of image attributes like color, intensity, etc., that render it in a given way when applied to the image. An image profile is created to enhance its quality for better extraction results for data extraction purposes. For example, in the given images, the image on the right displays the visual enhancement achieved after improving the image contrast of the left image.
To add an image profile, follow the steps below :
-
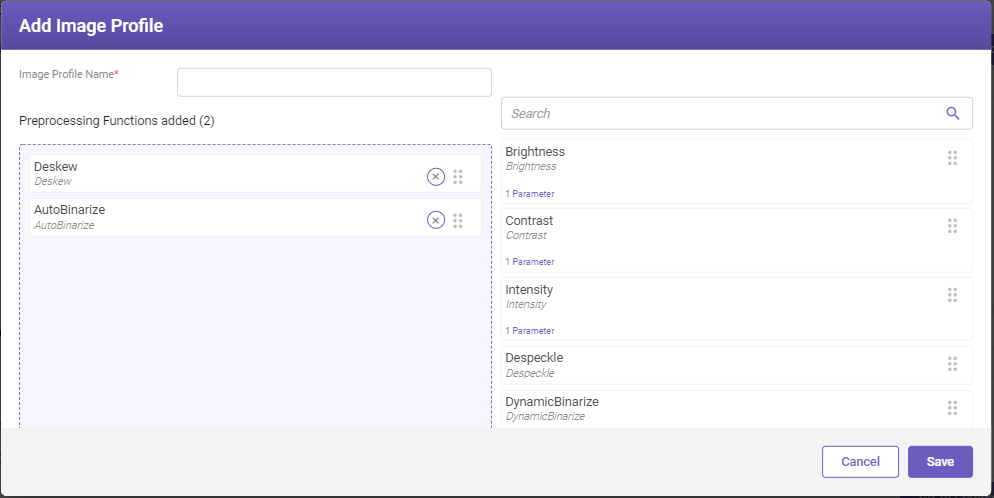
In the Image Profile Details group, click Add. The Add Image Profile window opens.
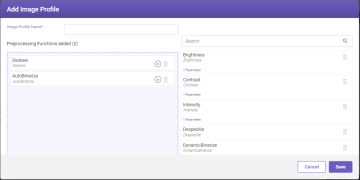
The descriptions of the field present in the window are given in the below table.
FIELD
DESCRIPTION
Image Profile Name*
Name of the image profile to be created.
Search
Search for an available pre-process function
Prepocessing functions added
List of the image attributes that can be / have been included in the image profile that is to be created for pre-processing a batch. More
 Available Preprocessing functions
-
Brightness
-
Contrast
-
Intensity
-
Deskew (selected by default)
-
Despeckle
-
AutoBiniarize (selected by default)
-
DynamicBinarize
-
Dilate
-
SmoothEdges
-
DotRemove
-
BorderRemove
-
Grayscale
-
GammaCorrect
-
InvertedPage
-
HolePunchRemove
-
LineRemove
-
RemoveSaltPepper
-
Sharpen
-
ColourDrop
-
RemoveColor
-
InvertText
-
Erode
-
Resize
Cancel
To exit without saving the changes.
Save
To exit after saving the changes.
* Mandatory fields
-
-
Enter the required image profile name.
-
Select the required pre-processing functions that are to be added in the image profile. To select a pre-processing function, drag the required function card on the right pane using
 , and drop it on the left pane.
-
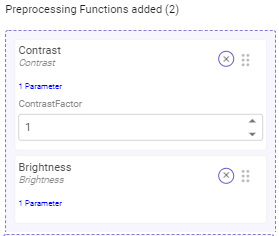
Click on the parameter link of the selected card and enter the parameters value(s), and save the changes.
-
Click Save to save the profile.
An image profile will be created and appear in the Image Profile Details group.
Note
To edit and delete an image profile, select it in the Image Profile Details group, and then click on Edit and Delete respectively.
Image profile marked with green dot cannot be edited or deleted as they have been published and are in use in the data extraction process.
Processing a batch
Follow the steps below to pre-process a selected batch:
-
In the Batch Details group, select the batch that you want to pre-process.
-
In the Image Profile Details group, select the image profile that you want to apply on the batch. You can also select multiple profiles if you want. In the latter case, pre-processing will be done separately for each image-profile.
-
Select an OCR engine, and click on Start Processing. The pre-processing will start and the image profile(s) will get applied on the batch. The status of the pre-processing operation will be displayed on the Request Details grid.
Note
As the pre-processing is solely done to find a suitable image profile and not for data extraction purposes, the status of the batch documents is displayed only on the Image Profiling Setup page and not considered while displaying the status of documents meant for data extraction like on the Queue Status page.
Image profile comparison
After a batch has been pre-processed using the available image profiles, you can compare the results obtained from the applied image-profiles on the Image Profiling Comparison page. To go to the page, click on Image Profile Comparison.